
搜索到
8
篇与
的结果
-
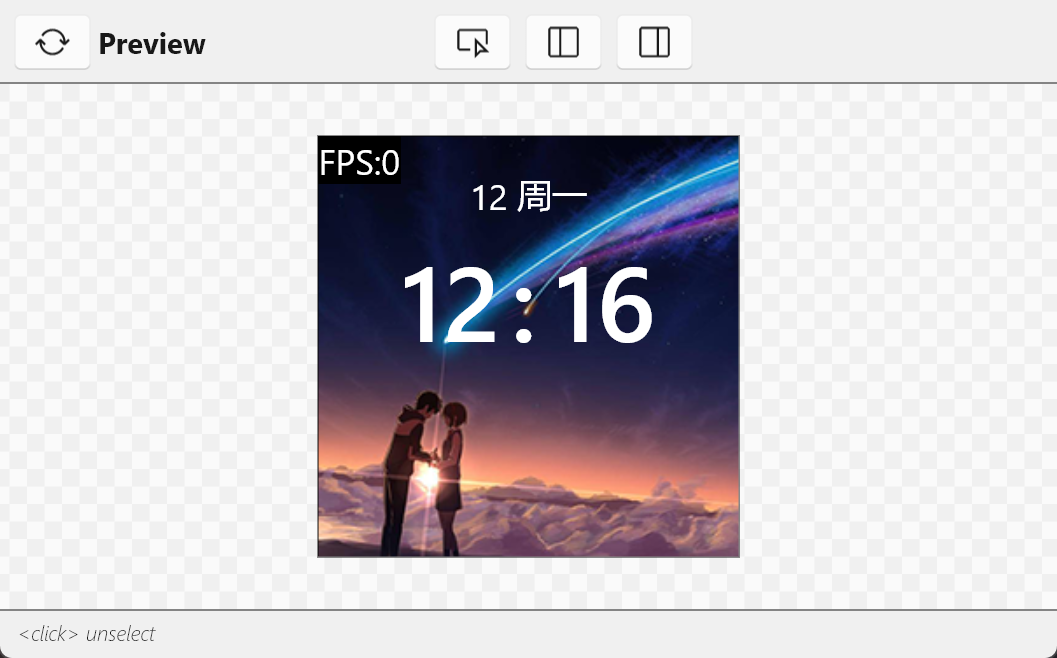
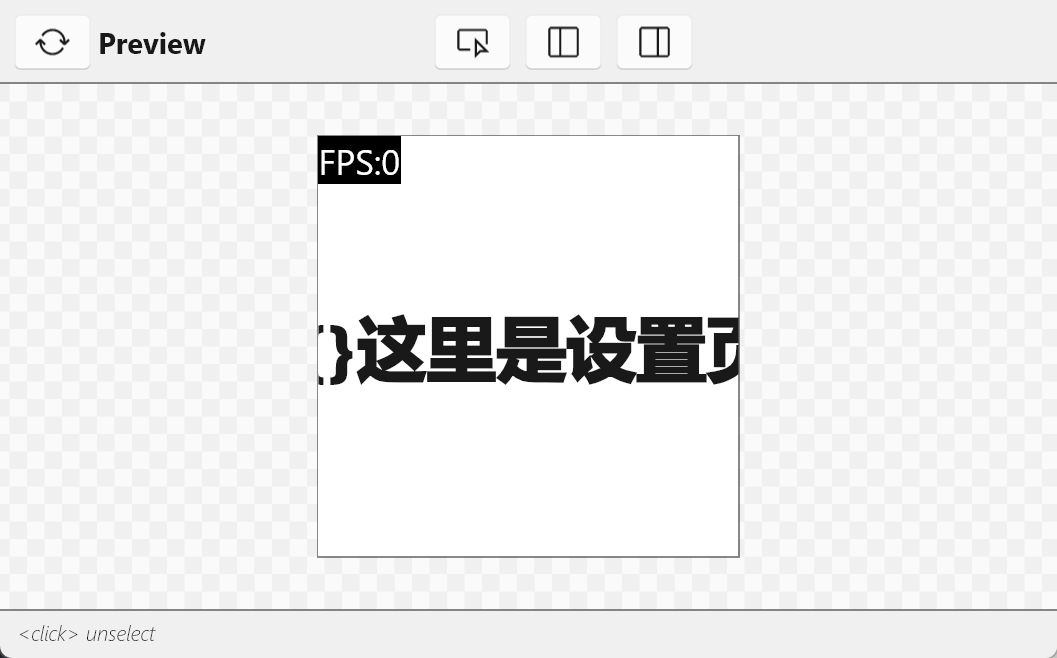
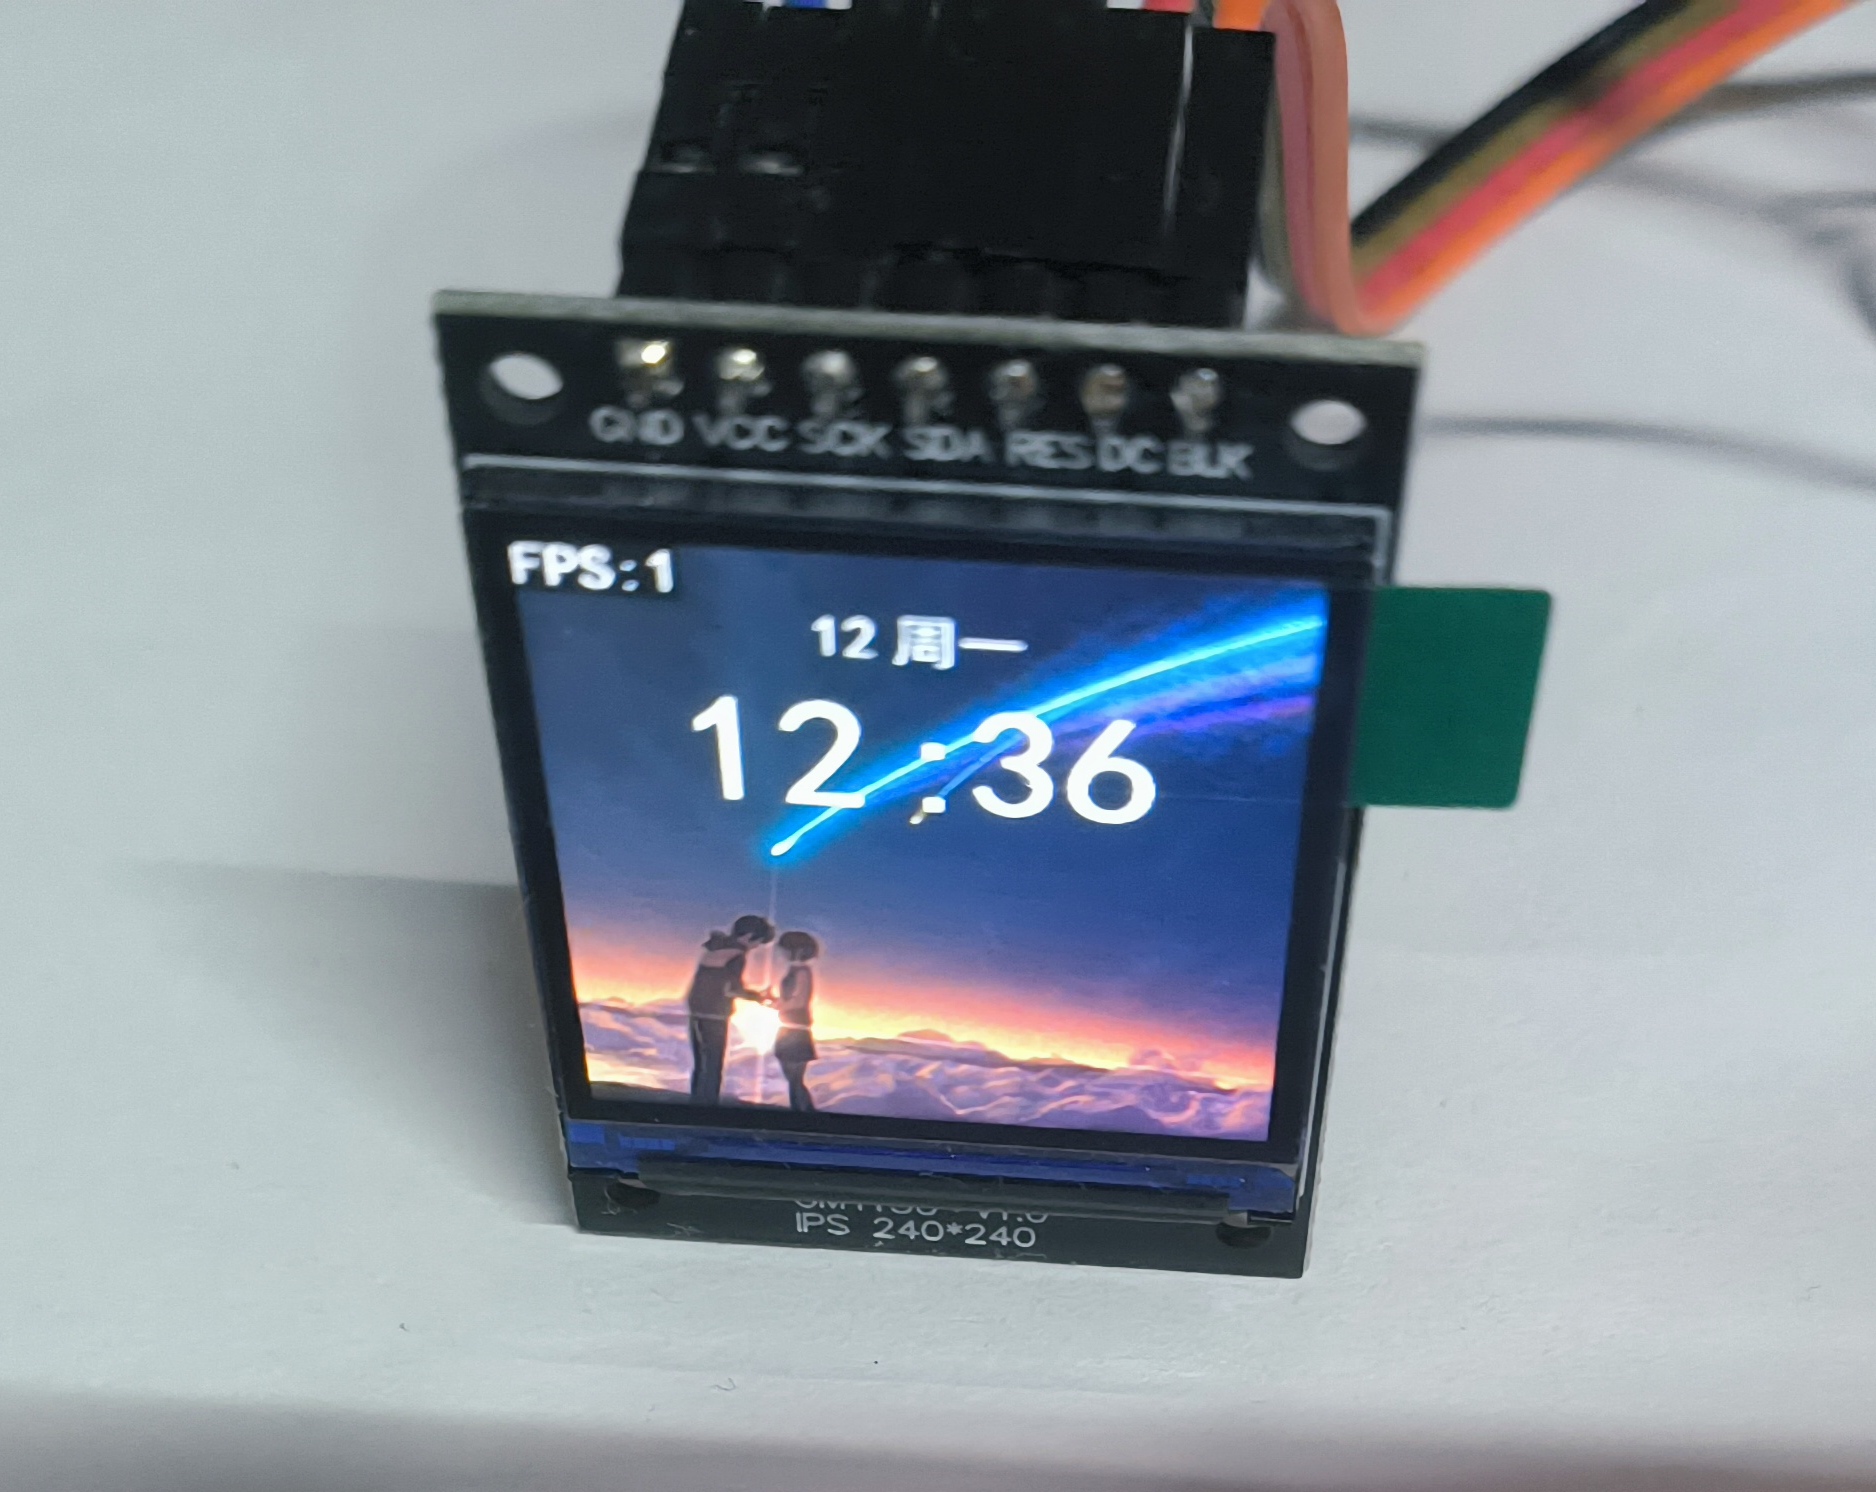
ESP32C3使用Slint渲染TFT屏幕 这个教程算是在st7789屏幕没有买之前就已经开始打算了,之前的使用slint驱动oled也算是为这个打下基础吧创建新项目可以参考 ESP32C3使用Slint渲染OLED屏幕 引入slint依赖,创建跟配置slint跟这篇文章一样,引入的依赖基本上大差不差,只不过这个项目还需要引入st7789屏幕的相关依赖。然后在Cargo.toml中添加依赖 [dependencies] # 基础依赖 critical-section = "1.2.0" esp-hal = { version = "1.0.0-beta.0", features = ["esp32c3","unstable"] } esp-alloc = "0.7.0" esp-println = { version = "0.13.1",features = ["esp32c3","log"] } log = "0.4.27" esp-backtrace = { version = "0.15.1" ,features = ["esp32c3","println","panic-handler"]} # 图形相关 embedded-hal = "1.0.0" embedded-graphics-core = "0.4.0" embedded-graphics = "0.8.1" embedded-graphics-framebuf = "0.5.0" display-interface = "0.5.0" display-interface-spi = "0.5.0" mipidsi = "0.9.0" embedded-hal-bus = "0.3.0" # 异步 esp-hal-embassy = { version = "0.7.0", features = ["esp32c3"] } embassy-time = { version = "0.4.0", features = ["generic-queue-8"] } embassy-executor = { version = "0.7.0",features = ["task-arena-size-20480","executor-thread"] } #embassy-futures = "0.1.1" static_cell = { version = "2.1.0", features = ["nightly"] } tinygif = "0.0.4" [dependencies.slint] git = "https://github.com/slint-ui/slint" rev = "29168bc89270798f6075a0a729c14a3f011ceb4f" # 修复提交的哈希 default-features = false features = [ "compat-1-2", "unsafe-single-threaded", # 启用单线程模式 "libm", "renderer-software", ] [build-dependencies] slint-build = {git = "https://github.com/slint-ui/slint",rev = "29168bc89270798f6075a0a729c14a3f011ceb4f"} 创建ui文件创建 ui/main.slint 文件,作为程序的入口文件import { System,LocalTime,Route , Setting} from "./global.slint"; import { HomePage } from "./page/home_page.slint"; import { SettingPage } from "./page/setting_page.slint"; // 导出给rust代码调用 export { System,LocalTime,Setting } export component MainView inherits Window { background: black; width: System.screen_width; height: System.screen_height; default-font-family: "黑体"; // 简单实现路由 if System.route==Route.HomePage: HomePage{} if System.route==Route.SettingPage: SettingPage{} // 显示帧率 if Setting.fps == true:Rectangle { padding: 2px; x:0px; y:0px; width: fps.width; height: fps.height; background: black; fps:=Text { font-size: 20px; text: @tr("FPS:{}",System.fps); color: white; } } // 触摸切换页面,用于测试 TouchArea { clicked => { if(System.route == Route.HomePage){ System.route = Route.SettingPage; }else{ System.route = Route.HomePage; } } } }创建 ui/global.slint 存储全局变量,跟rust代码进行交互 export enum Route { HomePage, SettingPage } export global System { // 屏幕宽高 out property <length> screen_width:240px; out property <length> screen_height:240px; // 路由页面 in-out property <Route> route:Route.HomePage; // 帧率 in-out property <int> fps:0; } export global Setting { // 开启fps帧率显示 in-out property <bool> fps:true; } export global LocalTime { in-out property <int> hour:12; in-out property <int> minute:12; in-out property <int> scond:30; in-out property <int> year:2025; in-out property <int> month:12; in-out property <int> day:12; in-out property <int> week:1; private property <[string]> weeks:["周日","周一","周二","周三","周四","周五","周六"]; in-out property <string> week_cn:weeks[week]; }创建ui/page/home_page.slint文件展示主页import { System,LocalTime } from "../global.slint"; export component HomePage inherits Rectangle{ width: System.screen_width; height: System.screen_height; // 背景图片 bg:=Image { source: @image-url("../../assets/bg_ndmz.png"); } animate x { easing: ease-in-out; duration: 300ms; } VerticalLayout { spacing: 4px; alignment: start; week:=HorizontalLayout{ padding-top: 20px; alignment: center; spacing: 5px; Text { text: LocalTime.month; color: white; font-size: 20px; } Text { text: LocalTime.week_cn; color: white; font-size: 20px; } } time:=HorizontalLayout { padding: 2px; spacing: 5px; alignment: center; Rectangle { // background: blue; Text { text: LocalTime.hour; font-size: 60px; color: white; font-weight: 500; } } Text { width: 20px; text: ":"; font-size: 60px; color: white; font-weight: 500; } Rectangle { // background: pink; Text { text: LocalTime.minute; font-size: 60px; color: white; font-weight: 500; } } } } // 这里的定时器是简单模拟时间,实际项目应该从rust代码传入时间 Timer { running: true; interval: 1s; triggered => { LocalTime.minute+=1; } } }创建ui/page/setting_page.slint展示设置页面,这里简单做了给跑马灯的效果import { System } from "../global.slint"; export component SettingPage inherits Rectangle{ width: System.screen_width; height: System.screen_height; background: white; property <length> pos_x:0px; text:=Text { x:pos_x; text: "{}这里是设置页面aaaadfsadfsdf"; font-size: 40px; font-weight: 999; } Timer { running: true; interval: 50ms; triggered => { if(pos_x < System.screen_width - text.width){ pos_x = System.screen_width; }else{ pos_x -= 1px; } } } }编写main.rs代码#![no_std] #![no_main] extern crate alloc; use alloc::boxed::Box; use alloc::format; use alloc::rc::Rc; use alloc::string::ToString; use alloc::vec::Vec; use core::cell::RefCell; use core::fmt::Debug; use core::sync::atomic::{AtomicBool, Ordering}; use critical_section::Mutex; use embassy_executor::Spawner; use embassy_time::Timer; use embedded_graphics::mono_font::ascii::FONT_10X20; use embedded_graphics::mono_font::iso_8859_7::FONT_5X8; use embedded_graphics::mono_font::MonoTextStyle; use embedded_graphics::prelude::Primitive; use embedded_graphics::primitives::PrimitiveStyle; use embedded_graphics::text::Text; use embedded_graphics_core::Drawable; use embedded_graphics_core::pixelcolor::{Bgr565, BinaryColor, Rgb565}; use embedded_graphics_core::prelude::{DrawTarget, ImageDrawable, Point, RgbColor, Size}; use embedded_graphics_core::primitives::Rectangle; use embedded_hal::delay::DelayNs; use embedded_hal_bus::spi::{ExclusiveDevice, NoDelay}; use esp_hal::clock::{CpuClock, RadioClockController}; use esp_hal::delay::Delay; use esp_hal::{handler, main, ram, spi, Blocking}; use esp_hal::gpio::{Event, Input, InputConfig, Io, Level, Output, OutputConfig, Pull}; use esp_hal::i2c::master::I2c; use esp_hal::peripherals::Peripherals; use esp_hal::rtc_cntl::Rtc; use esp_hal::spi::master::Config; use esp_hal::spi::master::Spi; use esp_hal::spi::Mode; use esp_hal::time::{Duration, Instant, Rate}; use esp_hal::timer::systimer::SystemTimer; use esp_hal::timer::timg::TimerGroup; use esp_println::logger::{init_logger, init_logger_from_env}; use esp_println::println; use log::{error, info, warn, LevelFilter}; use mipidsi::{Builder, Display}; use mipidsi::interface::SpiInterface; use mipidsi::models::ST7789; use mipidsi::options::{ColorInversion, Orientation}; use slint::platform::{Platform, WindowAdapter}; use slint::platform::software_renderer::{LineBufferProvider, MinimalSoftwareWindow, Rgb565Pixel}; use slint::{invoke_from_event_loop, ModelRc, PhysicalSize, PlatformError, Rgb8Pixel, Rgba8Pixel, SharedPixelBuffer, TimerMode, Weak}; slint::include_modules!(); #[panic_handler] fn panic(info: &core::panic::PanicInfo) -> ! { error!("panic:{}",info); loop {} } #[esp_hal_embassy::main] async fn main(spawner: Spawner) { // generator version: 0.3.1 // init_logger_from_env(); init_logger(LevelFilter::Debug); esp_alloc::heap_allocator!(size: 100 * 1024); info!("分配内存完成"); let config = esp_hal::Config::default().with_cpu_clock(CpuClock::max()); let peripherals =esp_hal::init(config); // 配置异步 let timer0 = SystemTimer::new(peripherals.SYSTIMER); esp_hal_embassy::init(timer0.alarm0); let mut delay = Delay::new(); let mut rst = Output::new(peripherals.GPIO3,Level::Low,OutputConfig::default()); rst.set_high(); let dc = Output::new(peripherals.GPIO4,Level::Low,OutputConfig::default()); let mut backlight = Output::new(peripherals.GPIO5,Level::Low,OutputConfig::default()); let sclk = peripherals.GPIO6; let sda = peripherals.GPIO7; let sdi = peripherals.GPIO8; let cs = peripherals.GPIO10; let spi = Spi::new(peripherals.SPI2, Config::default() .with_mode(Mode::_3) .with_frequency(Rate::from_mhz(60)) ).unwrap() .with_sck(sclk) .with_miso(sdi) .with_mosi(sda); let cs_output = Output::new(cs,Level::High,OutputConfig::default()); let spi_device = ExclusiveDevice::new_no_delay(spi,cs_output).unwrap(); let di = SpiInterface::new(spi_device,dc,unsafe{ &mut BUFFER }); let display = Builder::new(ST7789, di) .display_size(240,240) .invert_colors(ColorInversion::Inverted) .color_order(mipidsi::options::ColorOrder::Rgb) .orientation(Orientation::new()) .reset_pin(rst) .init(&mut delay).unwrap(); println!("display 初始化完成"); backlight.set_high(); info!("开启异步任务"); spawner.spawn(ui_run(display)).ok(); // for inspiration have a look at the examples at https://github.com/esp-rs/esp-hal/tree/esp-hal-v1.0.0-beta.0/examples/src/bin } static mut BUFFER: [u8; 512] = [0_u8; 512]; type DISPLAY = Display<SpiInterface<'static, ExclusiveDevice<Spi<'static,Blocking>,Output<'static>,NoDelay>,Output<'static>>,ST7789,Output<'static>>; #[embassy_executor::task] async fn ui_run(mut display: DISPLAY){ // 创建平台实例 let window = MinimalSoftwareWindow::new( slint::platform::software_renderer::RepaintBufferType::ReusedBuffer, ); window.set_size(PhysicalSize::new(240,240)); let platform = EspPlatform::new(window.clone()); slint::platform::set_platform(Box::new(platform)).unwrap(); // 创建ui let ui = MainView::new().unwrap(); ui.window().set_size(PhysicalSize::new(240,240)); // 初始化显示 display.clear(Rgb565::BLACK).unwrap(); info!("清理屏幕"); // 创建行缓冲区 let display_width = 240; // 根据实际显示宽度设置 let mut the_frame_buffer = [Rgb565Pixel(0); 240 ]; let mut time = Instant::now();; let mut last_frame_time = time.duration_since_epoch(); let mut fps = 0; let mut frame_count = 0; loop { frame_count+=1; // 更新UI状态 slint::platform::update_timers_and_animations(); // 渲染UI window.draw_if_needed(|renderer| { renderer.render_by_line(FrameBuffer{ frame_buffer: &mut the_frame_buffer, stride: display_width,display:&mut display }); }); // 计算FPS let now = time.duration_since_epoch(); if now.as_millis()-last_frame_time.as_millis() >= 1000{ last_frame_time = now; fps = frame_count; frame_count = 0; ui.global::<System>().set_fps(fps); } // 根据动画状态决定是否延迟 if !window.has_active_animations() { if let Some(duration) = slint::platform::duration_until_next_timer_update(){ Timer::after_millis(duration.as_millis() as u64).await; continue; } } Timer::after_millis(10).await; } } // 平台实现结构体 struct EspPlatform{ window: Rc<MinimalSoftwareWindow>, } impl EspPlatform { fn new(window:Rc<MinimalSoftwareWindow>) -> Self { Self { window } } } /// 实现 Platform trait impl Platform for EspPlatform { fn create_window_adapter(&self) -> Result<Rc<dyn WindowAdapter>, PlatformError> { info!("成功创建了window"); Ok(self.window.clone()) } fn duration_since_start(&self) -> core::time::Duration { // 使用定时器获取时间(需要实际硬件计时器实现) let time = Instant::now().duration_since_epoch().as_millis(); // info!("time :{}",time); core::time::Duration::from_millis( time ) } } struct FrameBuffer<'a>{ frame_buffer: &'a mut [Rgb565Pixel], stride: usize,display:&'a mut DISPLAY } impl<'a> LineBufferProvider for FrameBuffer<'a> { type TargetPixel = Rgb565Pixel; fn process_line( &mut self, line: usize, range: core::ops::Range<usize>, render_fn: impl FnOnce(&mut [Self::TargetPixel]), ) { let buf = &mut self.frame_buffer[range.clone()]; render_fn(buf); self.display.set_pixels( range.start as u16, line as _, range.end as u16, line as u16, buf.iter().map(|x|{ embedded_graphics_core::pixelcolor::raw::RawU16::new(x.0).into() }) ).unwrap() } } 效果展示浏览首页页面设置页面最终的效果展示

-
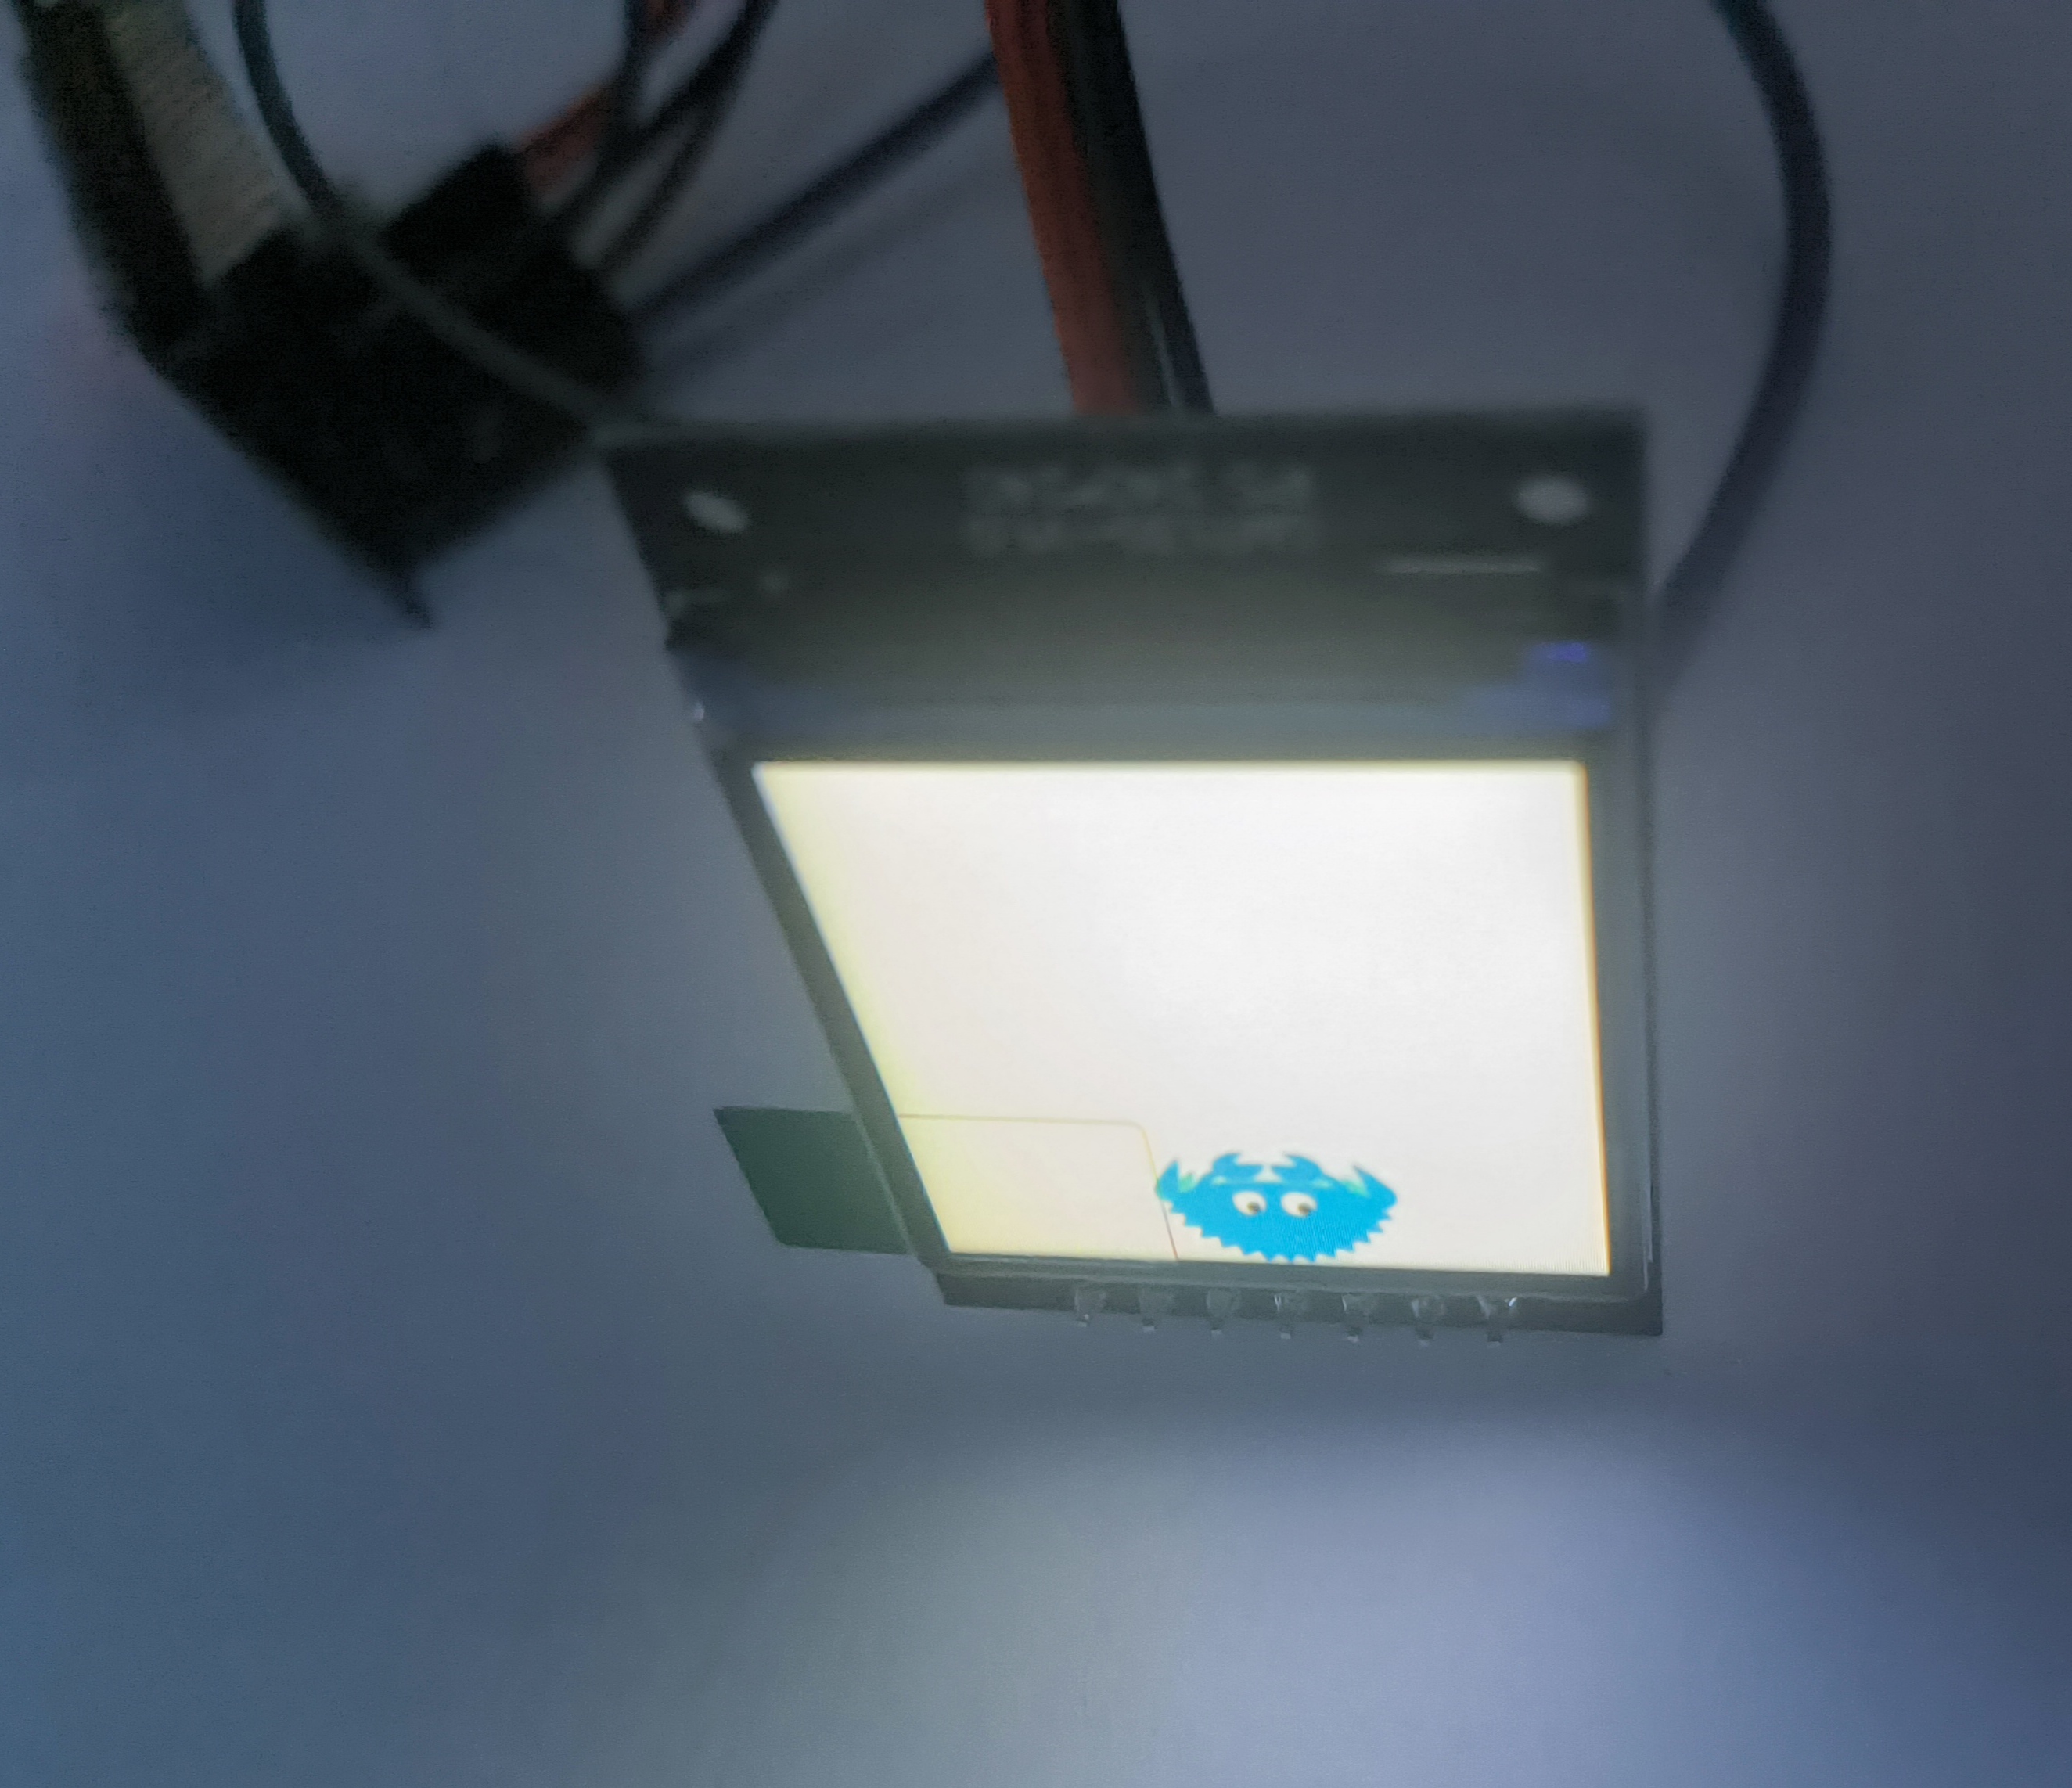
ESP32C3驱动TFT屏幕 因为使用的是新版esp-generate创建的项目,很多api的使用都大改了,网上能搜到的类似的教程也都完全没法用,这个教程是使用最新版esp-hal基于rust开发esp32c3驱动st7789屏幕。看网上有些项目叫MOSI,MISO的,也有叫SDI,SDO,这两个本质就是一个东西,在不同协议叫法不同。SPI 协议中大家都喜欢叫 MOSI / MISO,有些芯片厂商文档上写的是 SDI / SDO;MOSI == SDI(对于从机):表示“数据输入”MISO == SDO(对于从机):表示“数据输出”项目创建在 rust裸机开发esp32c3 的基础上,先新建一个最基础的环境引入依赖[dependencies] critical-section = "1.2.0" esp-hal = { version = "1.0.0-beta.0", features = ["esp32c3","unstable"] } esp-println = { version = "0.13.1",features = ["esp32c3","log"] } log = "0.4.27" # 图形相关 embedded-hal = "1.0.0" embedded-graphics-core = "0.4.0" embedded-graphics = "0.8.1" embedded-graphics-framebuf = "0.5.0" display-interface = "0.5.0" display-interface-spi = "0.5.0" mipidsi = "0.9.0" embedded-hal-bus = "0.3.0" 编写main.rs代码#![no_std] #![no_main] use embedded_graphics::Drawable; use embedded_graphics::image::{Image, ImageRawLE}; use embedded_graphics::pixelcolor::Rgb565; use embedded_graphics::prelude::{DrawTarget, Point, Primitive, RgbColor}; use embedded_graphics::primitives::PrimitiveStyle; use embedded_graphics_core::prelude::Size; use embedded_graphics_core::primitives::Rectangle; use embedded_hal::delay::DelayNs; use embedded_hal::digital::ErrorType; use embedded_hal_bus::spi::ExclusiveDevice; use esp_hal::clock::CpuClock; use esp_hal::delay::Delay; use esp_hal::gpio::{Level, Output, OutputConfig}; use esp_hal::main; use esp_hal::spi::master::{Config, Spi}; use esp_hal::spi::Mode; use esp_hal::time::{Duration, Instant, Rate}; use esp_println::logger::init_logger; use esp_println::println; use log::{error, LevelFilter}; use mipidsi::_mock::MockSpi; use mipidsi::models::ST7789; use mipidsi::Builder; use mipidsi::interface::SpiInterface; use mipidsi::options::Orientation; #[panic_handler] fn panic(e: &core::panic::PanicInfo) -> ! { println!("{}",e); loop { } } #[main] fn main() -> ! { // generator version: 0.3.1 let config = esp_hal::Config::default().with_cpu_clock(CpuClock::max()); init_logger(LevelFilter::Debug); let peripherals = esp_hal::init(config); let mut delay = Delay::new(); let mut rst = Output::new(peripherals.GPIO3,Level::Low,OutputConfig::default()); delay.delay_ms(20); // 保持 RST 为低电平至少 10~20ms rst.set_high(); // 然后再拉高 delay.delay_ms(100); // 拉高后也延迟一下,再继续初始化 let dc = Output::new(peripherals.GPIO4,Level::Low,OutputConfig::default()); let mut backlight = Output::new(peripherals.GPIO5,Level::Low,OutputConfig::default()); let sclk = peripherals.GPIO6; let sda = peripherals.GPIO7; let sdi = peripherals.GPIO8; let cs = peripherals.GPIO10; let spi = Spi::new(peripherals.SPI2, Config::default() .with_mode(Mode::_3) .with_frequency(Rate::from_mhz(40)) ).unwrap() .with_sck(sclk) .with_miso(sdi) .with_mosi(sda); let cs_output = Output::new(cs,Level::High,OutputConfig::default()); let spi_device = ExclusiveDevice::new_no_delay(spi,cs_output).unwrap(); let mut buffer = [0_u8; 512]; let di = SpiInterface::new(spi_device,dc,&mut buffer); let mut display = Builder::new(ST7789,di) .display_size(240,240) .orientation(Orientation::new()) .reset_pin(rst) .init(&mut delay).unwrap(); println!("display 初始化完成"); backlight.set_high(); let raw_image_data = ImageRawLE::new(include_bytes!("../../assets/ferris.raw"), 86); let mut x = 0; loop { display.clear(Rgb565::BLACK).unwrap(); let ferris = Image::new(&raw_image_data, Point::new(x, 0)); // draw image on black background display.clear(Rgb565::BLACK).unwrap(); ferris.draw(&mut display).unwrap(); delay.delay_millis(400); x+=10; if x >= 140{ x = 0; } } // for inspiration have a look at the examples at https://github.com/esp-rs/esp-hal/tree/esp-hal-v1.0.0-beta.0/examples/src/bin } 效果展示{callout color="#efb44d"}屏幕是倒着放到,图片显示是正的{/callout}{lamp/}本项目参考了mipidsi(esp32c3) esp-idf-hal/examples /spi_st7789.rs
-
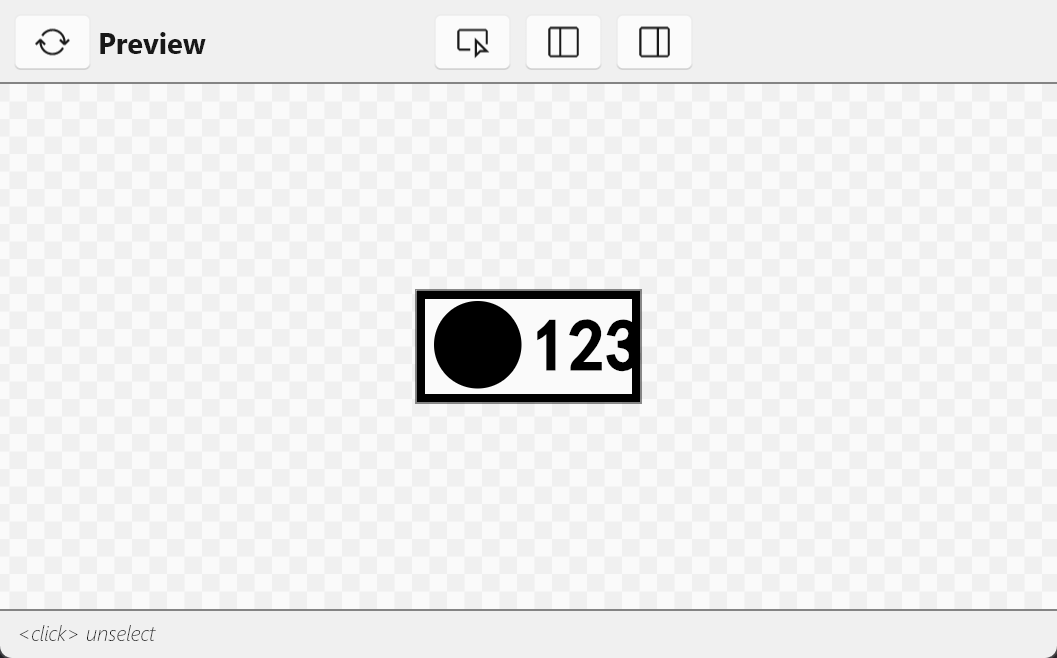
ESP32C3使用Slint渲染OLED屏幕 前言:说一下为什么要用slint,既然都选择用rust开发嵌入式了避免不了要折腾,也是为后续驱动st7789做铺垫吧。而其实对应OLED屏幕已经有一个很好用的库了embedded-graphics,几乎能满足OLED屏幕的全部需求了,但是slint有动画,定时器,声明式,这些优势,再嵌入式开发再合适不过了。在写这个的时候也遇到不少坑,所以记录一下吧创建项目引入库编译问题已经在 ESP32C3引入Slint 文章解决了先创建一个最基础的esp32c3的项目然后再Cargo.toml中添加依赖# 基础依赖 critical-section = "1.2.0" esp-hal = { version = "1.0.0-beta.0", features = ["esp32c3","unstable"] } esp-alloc = "0.7.0" esp-println = { version = "0.13.1",features = ["esp32c3","log"] } log = "0.4.27" esp-backtrace = { version = "0.15.1" ,features = ["esp32c3","println","panic-handler"]} # 图形相关 embedded-hal = "0.2.7" embedded-graphics-core = "0.4.0" embedded-graphics = "0.8.1" embedded-graphics-framebuf = "0.5.0" ssd1306 = { version = "0.10.0" ,features = ["graphics"]} # 异步 esp-hal-embassy = { version = "0.7.0", features = ["esp32c3"] } embassy-time = { version = "0.4.0", features = ["generic-queue-8"] } embassy-executor = { version = "0.7.0",features = ["task-arena-size-20480"] } static_cell = { version = "2.1.0", features = ["nightly"] } [dependencies.slint] git = "https://github.com/slint-ui/slint" rev = "29168bc89270798f6075a0a729c14a3f011ceb4f" # 修复提交的哈希 default-features = false features = [ "compat-1-2", "unsafe-single-threaded", # 启用单线程模式 "libm", "renderer-software", ] [build-dependencies] slint-build = {git = "https://github.com/slint-ui/slint",rev = "29168bc89270798f6075a0a729c14a3f011ceb4f"} 配置Slint我们使用slint的ui跟代码分离的模式,修改build.rs新增一个build_slint函数,然后在main函数中调用它 fn main(){ build_slint(); ... } fn build_slint(){ slint_build::compile_with_config( "ui/MainView.slint", slint_build::CompilerConfiguration::new() .embed_resources(slint_build::EmbedResourcesKind::EmbedForSoftwareRenderer) ).unwrap() }创建UI文件在项目根目录下创建 ui/MainView.slint 文件,定义 UI 界面// 由于是在no_std的环境下,没有默认字体,使用需要引入自定义的字体 import "./fonts/simhei.ttf"; // 这里定义了一个全局的状态,用于在rust代码里进行修改ui状态 export global MyState { in-out property <bool> is_show : true; } export component MainView inherits Window { default-font-family: "黑体"; width: 128px; height: 64px; Rectangle { x:0px; y:0px; width: 100%; height: 100%; background: transparent; border-color: black; border-width: 5px; } Rectangle { x:10px; y:6px; width: 50px; height: 50px; background: black; border-radius: 360px; visible: MyState.is_show; } property <bool> is_show : false; Rectangle { x:80px; y:6px; width: 20px; height: 20px; background: black; visible: is_show; } // 使用了slint的ui的定时器 timer:=Timer{ interval: 0.5s; running: true; triggered => { is_show = !is_show; } } Text { font-family: "SimHei"; text: "12345"; color: black; font-weight: 900; font-size: 40px; x:66px; } }编写main.rs代码因为是使用的no_std,没有多线程,而slint的run方法会调用invoke_from_event_loop方法,进而导致阻塞线程,所以需要改造,不使用run方法来渲染,而是手动处理渲染,在实现traitPlatform时,不去重写invoke_from_event_loop函数,我们在初始化代码块去使用异步发方式实现 slint::include_modules!(); #[panic_handler] fn panic(info: &core::panic::PanicInfo) -> ! { loop { error!("panic:{}",info); } } #[esp_hal_embassy::main] async fn main(spawner: Spawner) -> ! { // generator version: 0.3.1 // init_logger_from_env(); init_logger(LevelFilter::Debug); esp_alloc::heap_allocator!(size: 100 * 1024); info!("分配内存完成"); let config = esp_hal::Config::default().with_cpu_clock(CpuClock::max()); let peripherals =esp_hal::init(config); // 配置异步 let timer0 = SystemTimer::new(peripherals.SYSTIMER); esp_hal_embassy::init(timer0.alarm0); let i2c = esp_hal::i2c::master::I2c::new(peripherals.I2C0, esp_hal::i2c::master::Config::default() .with_frequency(Rate::from_khz(400))) .unwrap() .with_sda(peripherals.GPIO8) .with_scl(peripherals.GPIO9); let display = Ssd1306::new( I2CDisplayInterface::new(i2c), DisplaySize128x64, DisplayRotation::Rotate0).into_buffered_graphics_mode(); info!("开启异步任务"); spawner.spawn(ui_run(display,spawner)).ok(); loop{ Timer::after_secs(2).await; } // for inspiration have a look at the examples at https://gitcahub.com/esp-rs/esp-hal/tree/esp-hal-v1.0.0-beta.0/examples/src/bin } #[embassy_executor::task] async fn ui_run(mut display: SSD,spawner: Spawner){ // 创建平台实例 let window = slint::platform::software_renderer::MinimalSoftwareWindow::new( slint::platform::software_renderer::RepaintBufferType::ReusedBuffer, ); window.set_size(PhysicalSize::new(128,64)); let platform = EspPlatform::new(window.clone()); slint::platform::set_platform(Box::new(platform)).unwrap(); // 创建ui let ui = MainView::new().unwrap(); ui.window().set_size(PhysicalSize::new(128,64)); let ui_weak = ui.as_weak(); spawner.spawn(ui_task(ui_weak)).ok(); info!("进入了loop run"); // 初始化显示 display.init().unwrap(); display.clear(BinaryColor::Off).unwrap(); display.flush().unwrap(); info!("清理屏幕 on"); // 创建行缓冲区 let display_width = 128; // 根据实际显示宽度设置 let mut the_frame_buffer = [Rgb565Pixel(0); 128 * 64]; // 128x64 // 这里是我们手动实现的invoke_from_event_loop loop { // 更新UI状态 slint::platform::update_timers_and_animations(); // 渲染UI window.draw_if_needed(|renderer| { info!("进入渲染回调"); renderer.render_by_line(FrameBuffer{ frame_buffer: &mut the_frame_buffer, stride: display_width,display:&mut display }); info!("退出渲染回调"); // 退出渲染回调,说明整个帧已经渲染完成,这时候刷新屏幕 display.flush().unwrap(); }); Timer::after_millis(100).await; } } #[embassy_executor::task] async fn ui_task(view:Weak<MainView>){ info!("ui_task 已经开启"); loop{ // 在这里用rust的代码更新slint的ui状态 let view = view.clone(); let view = view.upgrade().unwrap(); let show = view.global::<MyState>().get_is_show(); view.global::<MyState>().set_is_show(!show); info!("show的状态为:{}",show); Timer::after_secs(2).await; } } // 平台实现结构体 // 为了方便,先将OLED的屏幕生命周期设置为静态的 type SSD = Ssd1306<I2CInterface<I2c<'static,Blocking>>,DisplaySize128x64,BufferedGraphicsMode<DisplaySize128x64>>; struct EspPlatform{ window: Rc<slint::platform::software_renderer::MinimalSoftwareWindow>, } impl EspPlatform { fn new(window:Rc<MinimalSoftwareWindow>) -> Self { Self { window } } } /// 实现 Platform trait impl Platform for EspPlatform { fn create_window_adapter(&self) -> Result<Rc<dyn WindowAdapter>, PlatformError> { info!("成功创建了window"); Ok(self.window.clone()) } fn duration_since_start(&self) -> core::time::Duration { let time = Instant::now().duration_since_epoch().as_millis(); // info!("time :{}",time); core::time::Duration::from_millis( time ) } } struct FrameBuffer<'a>{ frame_buffer: &'a mut [Rgb565Pixel], stride: usize,display:&'a mut SSD } impl<'a> LineBufferProvider for FrameBuffer<'a> { type TargetPixel = Rgb565Pixel; fn process_line( &mut self, line: usize, range: core::ops::Range<usize>, render_fn: impl FnOnce(&mut [Self::TargetPixel]), ) { let line_start = line * self.stride; let line_pixels = &mut self.frame_buffer[line_start..line_start + 128]; render_fn(&mut line_pixels[range.clone()]); // 规定黑色为亮,由于是在oled屏幕上渲染,只有亮或者不亮,为了方便我们规定一个颜色为亮色,其余的颜色都视为不亮,在ui页面也是,使用黑色作为渲染的区域 let black = Rgb565Pixel(0); for (x,row) in line_pixels.iter().enumerate(){ // 先将要更新的行的地方进行清屏 self.display.set_pixel(x as u32,line as u32,false); // 然后对应要渲染的像素点进行渲染 if row == &black{ self.display.set_pixel(x as u32, line as u32, true); } } } } 编译查看效果预览页面烧录的效果跟我们slint编写的ui页面一致
-
ESP32C3引入Slint: 解决依赖冲突 为什么要折腾这个?想在 ESP32-C3 开发板上实现一个酷炫的 UI 界面,选了 Rust 生态的 Slint 框架。结果刚加上依赖就报错:error: 不能同时启用 critical-section 和 portable_atomic_unsafe_assume_single_core这两个特性不能同时存在解决问题过程第一步:创建最小测试项目# 生成纯净的 ESP32-C3 项目骨架 esp-generate --chip=esp32c3 slint_demo此时项目仅包含最基础的硬件驱动,编译一次成功:cargo build Compiling slint_demo v0.1.0 Finished dev [optimized] target(s)第二步:引入 Slint 引爆问题按官方文档添加依赖:cargo add slint@1.10.0 --no-default-features --features "compat-1-2 unsafe-single-threaded libm renderer-software"再次编译立刻报错:error: critical-section 与 portable_atomic_unsafe_assume_single_core 冲突第三步:定位问题注释 Slint 保留 ESP-HAL → 编译成功注释 ESP-HAL 保留 Slint → 依然报错Slint 的依赖树里藏了冲突的组件第四步:解决问题搜索 slint critical-section site:github.com锁定关键讨论:Issue #5057发现修复补丁:Commit 29168bc核心修改点:# Slint 内部配置调整 - portable-atomic = { features = ["critical-section"] } + portable-atomic = {} # 解除强制依赖最终配置方案关键依赖声明 (Cargo.toml)[dependencies] # 硬件抽象层 esp-hal = { version = "1.0.0-beta.0", default-features = false, features = ["esp32c3"] # 注意关闭默认特性 } # UI 框架 [dependencies.slint] git = "https://github.com/slint-ui/slint" rev = "29168bc89270798f6075a0a729c14a3f011ceb4f" # 锁定修复版本 default-features = false features = [ "compat-1-2", # 兼容旧版 API "unsafe-single-threaded", # 单核模式 "libm", # 数学库支持 "renderer-software" # 软件渲染 ] # 内存分配器 esp-alloc = "0.7.0"内存管理配置 (main.rs)// 初始化堆内存(72KB 用于 UI) #[main] fn main() -> ! { let config = esp_hal::Config::default().with_cpu_clock(CpuClock::max()); let _peripherals = esp_hal::init(config); esp_alloc::heap_allocator!(size: 72 * 1024); }经验总结依赖管理铁律用 cargo tree -e features 查看依赖关系通过 default-features = false 精准控制特性版本锁定技巧使用 rev = "commit_hash" 锁定特定修复版本定期检查 GitHub Issues 跟踪问题进展
-
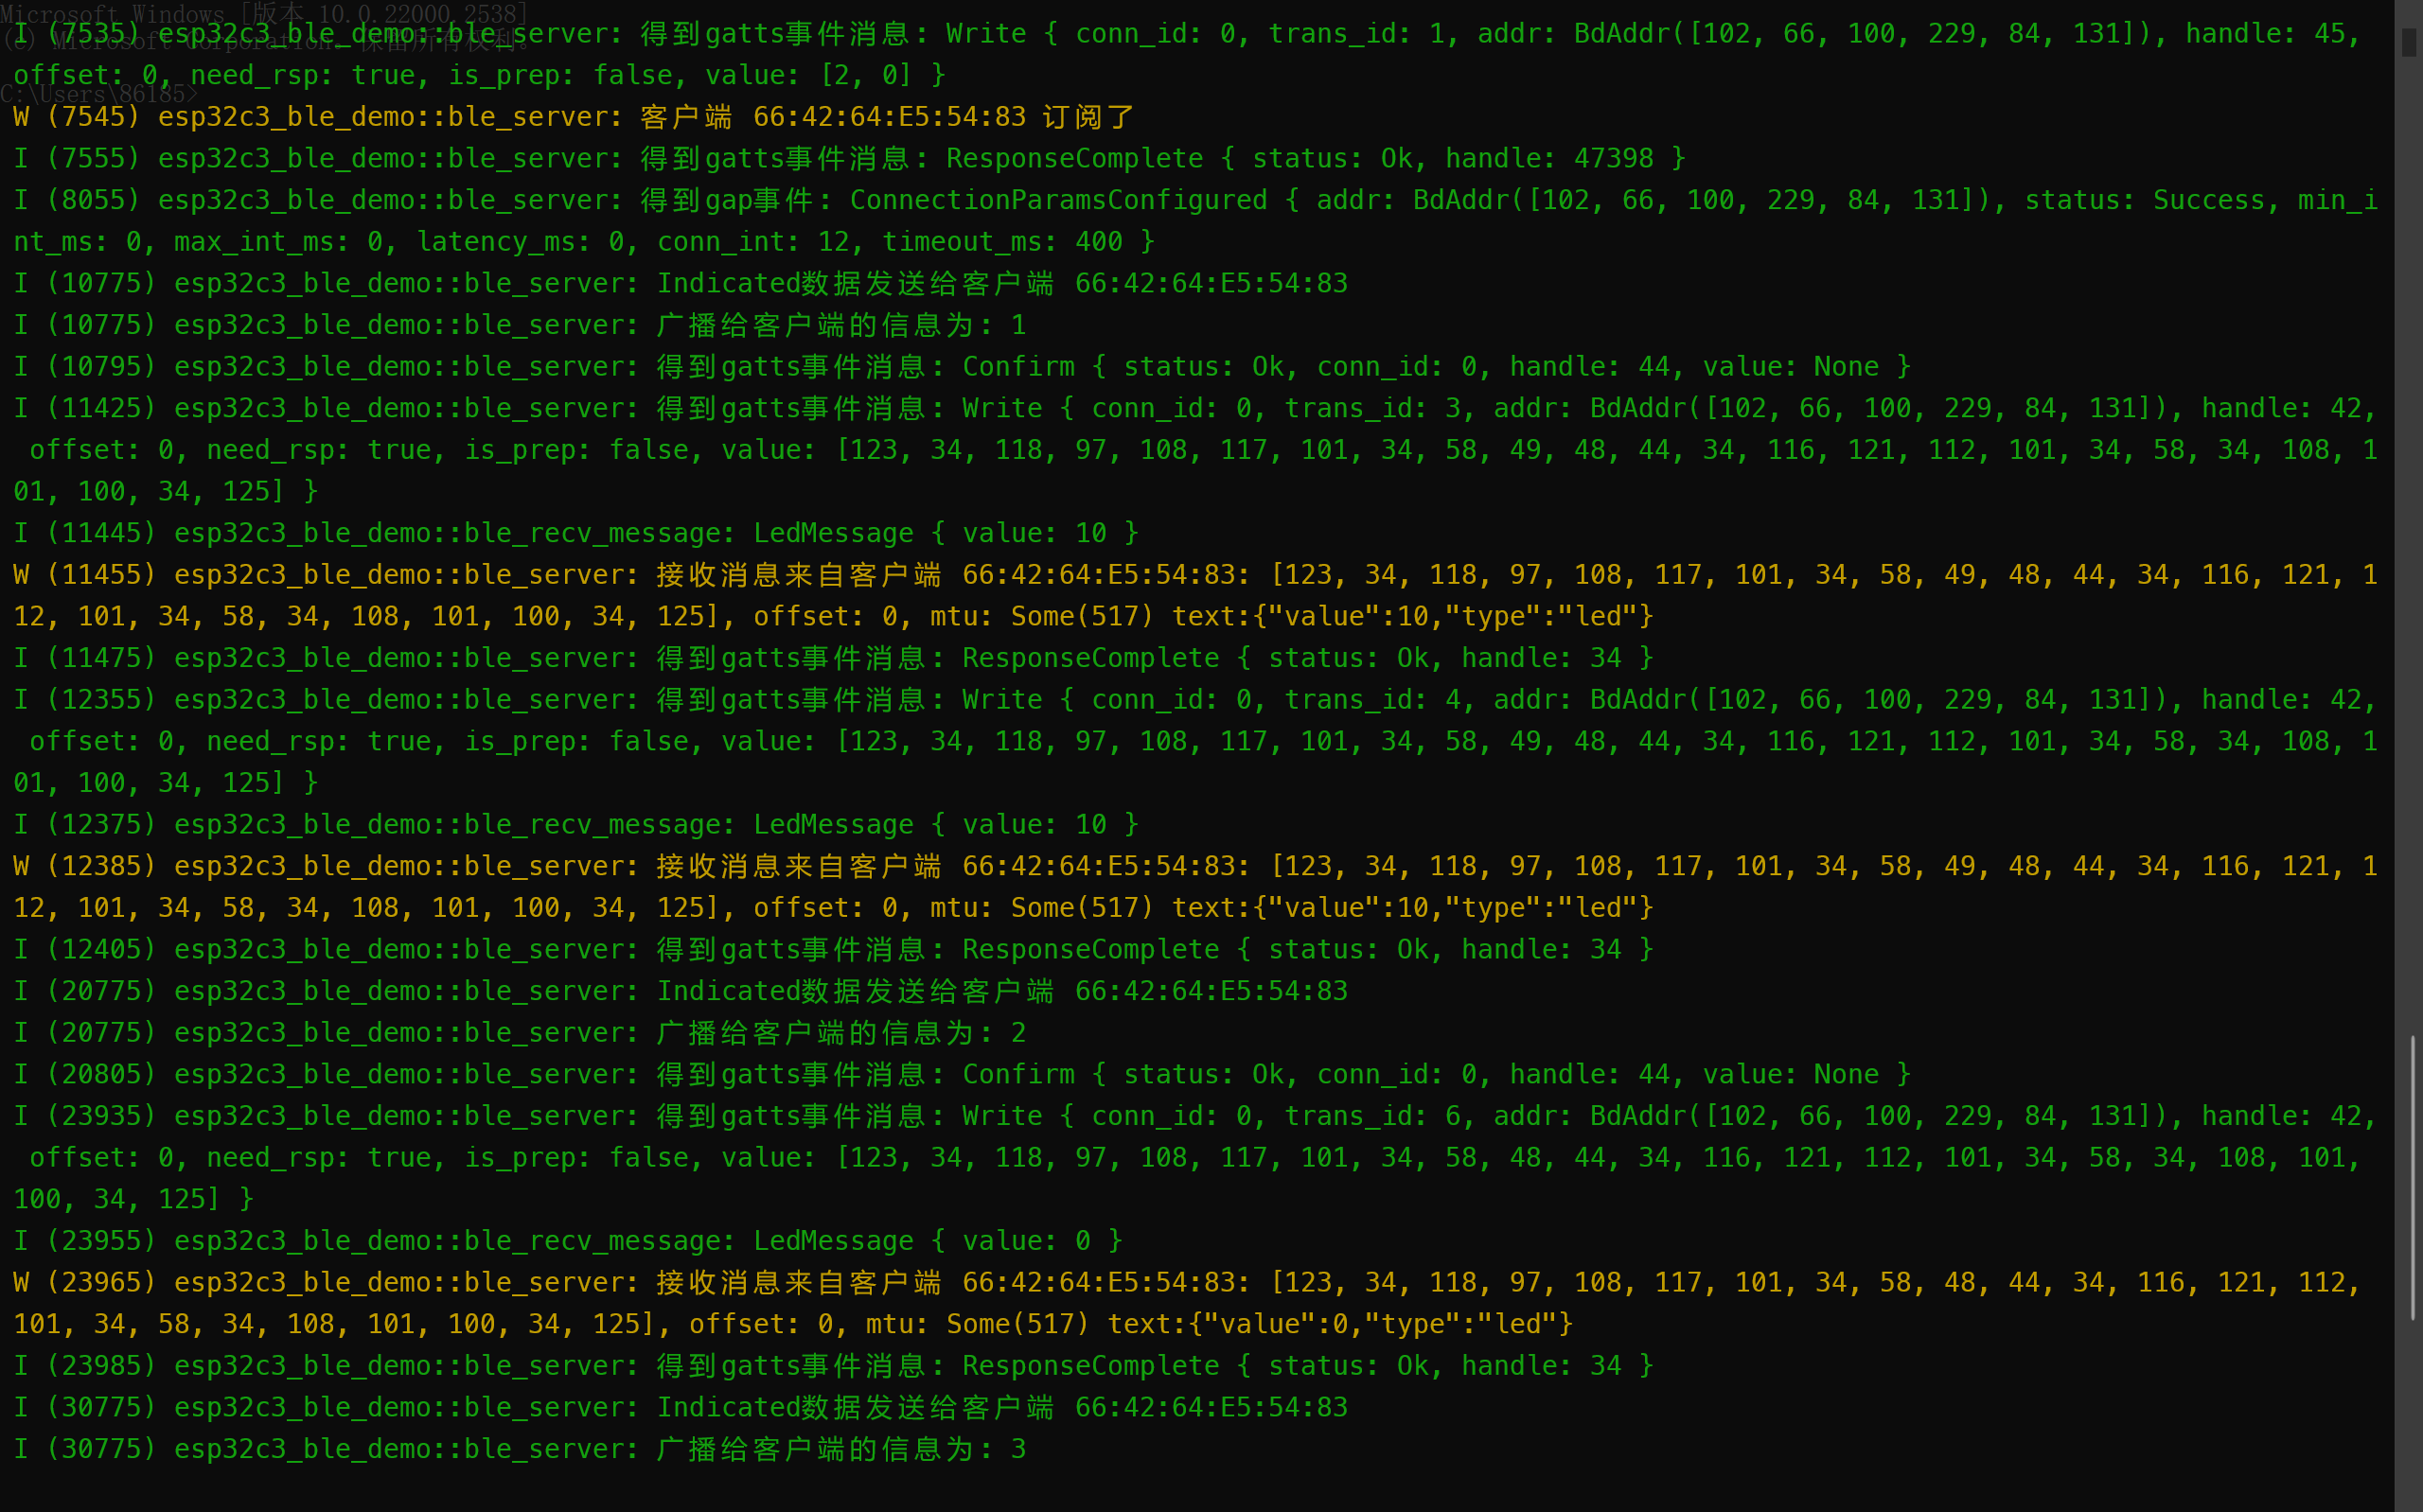
ESP32C3使用BLE 初始化项目参考 项目创建 新建一个基于std的新项目在Cargo.toml添加必要的依赖[package] name = "esp32c3-ble-demo" version = "0.1.0" authors = ["suxii <m@suxii.cn>"] edition = "2021" resolver = "2" rust-version = "1.77" [[bin]] name = "esp32c3-ble-demo" harness = false # do not use the built in cargo test harness -> resolve rust-analyzer errors [features] default = [] experimental = ["esp-idf-svc/experimental"] [dependencies] log = "0.4" esp-idf-svc = { version = "0.51", features = ["critical-section", "embassy-time-driver", "embassy-sync","experimental","std"] } futures = "0.3.31" anyhow = "1.0.98" enumset = "1.1.5" heapless = "0.8.0" esp-idf-sys = "0.36.1" esp-idf-hal = "0.45.2" # 处理序列化,反序列化 serde = { version = "1.0.219", features = ["derive"] } serde_json = "1.0.140" [build-dependencies] embuild = "0.33" 开启BLE功能将sdkconfig.defaults 文件替换成# Rust often needs a bit of an extra main task stack size compared to C (the default is 3K) CONFIG_ESP_MAIN_TASK_STACK_SIZE=7000 CONFIG_BT_BLUEDROID_ENABLED=y CONFIG_BT_ENABLED=y CONFIG_BT_BLE_ENABLED=y CONFIG_BT_GATTS_ENABLE=y CONFIG_BT_BLE_SMP_ENABLE=y CONFIG_BT_GATTS_SEND_SERVICE_CHANGE_MODE=y CONFIG_BT_BTC_TASK_STACK_SIZE=7000 CONFIG_BT_BLE_42_FEATURES_SUPPORTED=y CONFIG_BT_CTRL_BLE_MAX_ACT=10 CONFIG_BT_CTRL_BLE_MAX_ACT_EFF=10 CONFIG_BT_CTRL_BLE_STATIC_ACL_TX_BUF_NB=0 CONFIG_BT_CTRL_BLE_ADV_REPORT_FLOW_CTRL_SUPP=y CONFIG_BT_CTRL_BLE_ADV_REPORT_FLOW_CTRL_NUM=100 CONFIG_BT_CTRL_BLE_ADV_REPORT_DISCARD_THRSHOLD=20 CONFIG_BT_CTRL_BLE_SCAN_DUPL=y # Use this to set FreeRTOS kernel tick frequency to 1000 Hz (100 Hz by default). # This allows to use 1 ms granuality for thread sleeps (10 ms by default). #CONFIG_FREERTOS_HZ=1000 # Workaround for https://github.com/espressif/esp-idf/issues/7631 #CONFIG_MBEDTLS_CERTIFICATE_BUNDLE=n #CONFIG_MBEDTLS_CERTIFICATE_BUNDLE_DEFAULT_FULL=n并且在同级目录新建一个 sdkconfig.esp32c3文件# Rust often needs a bit of an extra main task stack size compared to C (the default is 3K) CONFIG_ESP_MAIN_TASK_STACK_SIZE=7000 CONFIG_BT_ENABLED=y CONFIG_BT_BLE_ENABLED=y CONFIG_BT_GATTS_ENABLE=y CONFIG_BT_GATTS_SEND_SERVICE_CHANGE_MODE=y CONFIG_BT_BTC_TASK_STACK_SIZE=7000 CONFIG_BTDM_CTRL_MODE_BLE_ONLY=y CONFIG_BTDM_CTRL_MODE_BR_EDR_ONLY=n CONFIG_BTDM_CTRL_MODE_BTDM=n # Use this to set FreeRTOS kernel tick frequency to 1000 Hz (100 Hz by default). # This allows to use 1 ms granuality for thread sleeps (10 ms by default). #CONFIG_FREERTOS_HZ=1000 # Workaround for https://github.com/espressif/esp-idf/issues/7631 #CONFIG_MBEDTLS_CERTIFICATE_BUNDLE=n #CONFIG_MBEDTLS_CERTIFICATE_BUNDLE_DEFAULT_FULL=n代码编写新建一个ble_server.rs文件,用来管理BLE use std::sync::{mpsc, Arc, Condvar, Mutex}; use std::thread; use enumset::enum_set; use esp_idf_hal::ledc::{LedcDriver, LedcTimerDriver, Resolution}; use esp_idf_hal::modem; use esp_idf_svc::bt::ble::gap::{AdvConfiguration, BleGapEvent, EspBleGap}; use esp_idf_svc::bt::ble::gatt::server::{ConnectionId, EspGatts, GattsEvent, TransferId}; use esp_idf_svc::bt::ble::gatt::{ AutoResponse, GattCharacteristic, GattDescriptor, GattId, GattInterface, GattResponse, GattServiceId, GattStatus, Handle, Permission, Property, }; use esp_idf_svc::bt::{BdAddr, Ble, BtDriver, BtStatus, BtUuid}; use esp_idf_svc::hal::delay::FreeRtos; use esp_idf_svc::nvs::{ EspNvsPartition, NvsDefault}; use esp_idf_svc::sys::{EspError, ESP_FAIL}; use log::{error, info, warn}; use crate::ble_recv_message; use crate::message::Message; pub fn start( modem: modem::Modem, nvs_clone:EspNvsPartition<NvsDefault> ) -> anyhow::Result<()> { // nvs(Non-Volatile Storage,非易失性存储)是持久化存储,保证断电数据不丢失 // 创建ble蓝牙驱动 let bt = Arc::new(BtDriver::new(modem, Some(nvs_clone))?); // 自定义一个蓝牙集合服务,创建gap,跟gatts let server = ExampleServer::new( Arc::new(EspBleGap::new(bt.clone())?), Arc::new(EspGatts::new(bt.clone())?), ); info!("BLE Gap and Gatts 初始化完成"); let gap_server = server.clone(); // 处理gap事件回调吗,gap在连接阶段参与,不参与内容传输 server.gap.subscribe(move |event| { gap_server.check_esp_status(gap_server.on_gap_event(event)); })?; let gatts_server = server.clone(); // gap处理完成,说明连接已经建立了,现在开始处理gatt,也就是数据通信的部分 server.gatts.subscribe(move |(gatt_if, event)| { gatts_server.check_esp_status(gatts_server.on_gatts_event(gatt_if, event)) })?; info!("BLE Gap and Gatts 订阅事件初始化完成"); server.gatts.register_app(APP_ID)?; info!("Gatts BTP app 完成注册"); // 新线程处理发送消息 let _ = thread::Builder::new() .stack_size(2000) .spawn(move||{ let mut ind_data = 0_u16; loop { server.indicate(&ind_data.to_le_bytes()).unwrap(); info!("广播给客户端的信息为: {ind_data}"); ind_data = ind_data.wrapping_add(1); FreeRtos::delay_ms(10000); } }); anyhow::Ok(()) } const APP_ID: u16 = 0; const MAX_CONNECTIONS: usize = 2; // Our service UUID pub const SERVICE_UUID: u128 = 0xad91b201734740479e173bed82d75f9d; /// Our "recv" characteristic - i.e. where clients can send data. pub const RECV_CHARACTERISTIC_UUID: u128 = 0xb6fccb5087be44f3ae22f85485ea42c4; /// Our "indicate" characteristic - i.e. where clients can receive data if they subscribe to it pub const IND_CHARACTERISTIC_UUID: u128 = 0x503de214868246c4828fd59144da41be; type ExBtDriver = BtDriver<'static, Ble>; type ExEspBleGap = Arc<EspBleGap<'static, Ble, Arc<ExBtDriver>>>; type ExEspGatts = Arc<EspGatts<'static, Ble, Arc<ExBtDriver>>>; #[derive(Debug, Clone)] struct Connection { peer: BdAddr, conn_id: Handle, subscribed: bool, mtu: Option<u16>, } #[derive(Default)] struct State { gatt_if: Option<GattInterface>, service_handle: Option<Handle>, recv_handle: Option<Handle>, ind_handle: Option<Handle>, ind_cccd_handle: Option<Handle>, connections: heapless::Vec<Connection, MAX_CONNECTIONS>, response: GattResponse, ind_confirmed: Option<BdAddr>, } #[derive(Clone)] pub struct ExampleServer { gap: ExEspBleGap, gatts: ExEspGatts, state: Arc<Mutex<State>>, condvar: Arc<Condvar>, } impl ExampleServer { pub fn new(gap: ExEspBleGap, gatts: ExEspGatts) -> Self { Self { gap, gatts, state: Arc::new(Mutex::new(Default::default())), condvar: Arc::new(Condvar::new()), } } } impl ExampleServer { // 发送indicate消息 fn indicate(&self, data: &[u8]) -> Result<(), EspError> { for peer_index in 0..MAX_CONNECTIONS { // 发送数据给全部已经订阅的服务 let mut state = self.state.lock().unwrap(); loop { if state.connections.len() <= peer_index { // 表示已经向全部订阅的客户发送了消息 break; } let Some(gatt_if) = state.gatt_if else { // 丢失了gatt的接口连接 break; }; let Some(ind_handle) = state.ind_handle else { // 丢失了handle break; }; // confirmed翻译为 证实 // 检查状态:确保上次的指示数据已被客户端确认接收。 // 发送数据:如果状态允许,则向指定客户端发送新的指示数据。 // 更新状态:记录当前客户端已接收到指示数据。 // 等待条件:如果状态不允许发送数据,则等待其他线程的通知。 if state.ind_confirmed.is_none() { let conn = &state.connections[peer_index]; self.gatts .indicate(gatt_if, conn.conn_id, ind_handle, data)?; state.ind_confirmed = Some(conn.peer); let conn = &state.connections[peer_index]; info!("Indicated数据发送给客户端 {}", conn.peer); break; } else { state = self.condvar.wait(state).unwrap(); } } } Ok(()) } /// 处理客户端订阅 fn on_subscribed(&self, addr: BdAddr) { // todo 客户端订阅 warn!("客户端 {addr} 订阅了"); } /// 处理客户端取消订阅 fn on_unsubscribed(&self, addr: BdAddr) { // todo 客户肯定取消订阅 warn!("客户端 {addr} 取消订阅"); } /// 接收消息回调 fn on_recv(&self, addr: BdAddr, data: &[u8], offset: u16, mtu: Option<u16>) { // todo 这里写接收消息的逻辑 // 按大端解析 // let res = u16::from_be_bytes([data[0],data[1]]); let res = String::from_utf8_lossy(data); if let Err(e) = ble_recv_message::handle_message(&res){ error!("处理消息错误:{e}") } warn!("接收消息来自客户端 {addr}: {data:?}, offset: {offset}, mtu: {mtu:?} text:{res}"); } /// GAP 事件的主事件处理程序 fn on_gap_event(&self, event: BleGapEvent) -> Result<(), EspError> { info!("得到gap事件: {event:?}"); // ble广播配置 Advertising:广告,广播 if let BleGapEvent::AdvertisingConfigured(status) = event { // 从gap事件中,结构出BtStatus状态,然后检查bt的状态 // 如果bt连接状态检查不通过,就直接往上级抛异常 self.check_bt_status(status)?; // gap处理完成,开启广播 self.gap.start_advertising()?; } Ok(()) } /// GATTS 事件的主事件处理程序 fn on_gatts_event( &self, gatt_if: GattInterface, event: GattsEvent, ) -> Result<(), EspError> { info!("得到gatts事件消息: {event:?}"); match event { // 处理服务注册,注册成功后,创建服务 GattsEvent::ServiceRegistered { status, app_id } => { self.check_gatt_status(status)?; if APP_ID == app_id { self.create_service(gatt_if)?; } } // 处理服务创建完成后的事件,配置gatts的服务 GattsEvent::ServiceCreated { status, service_handle, .. } => { self.check_gatt_status(status)?; self.configure_and_start_service(service_handle)?; } // 处理特征添加 GattsEvent::CharacteristicAdded { status, attr_handle, service_handle, char_uuid, } => { self.check_gatt_status(status)?; self.register_characteristic(service_handle, attr_handle, char_uuid)?; } // 添加描述符 GattsEvent::DescriptorAdded { status, attr_handle, service_handle, descr_uuid, } => { self.check_gatt_status(status)?; self.register_cccd_descriptor(service_handle, attr_handle, descr_uuid)?; } // 删除服务 GattsEvent::ServiceDeleted { status, service_handle, } => { self.check_gatt_status(status)?; self.delete_service(service_handle)?; } // 注销服务 GattsEvent::ServiceUnregistered { status, service_handle, .. } => { self.check_gatt_status(status)?; self.unregister_service(service_handle)?; } // 注册或更新其 MTU(Maximum Transmission Unit 最大传输单元)值 GattsEvent::Mtu { conn_id, mtu } => { self.register_conn_mtu(conn_id, mtu)?; } // 处理连接的客户端 GattsEvent::PeerConnected { conn_id, addr, .. } => { self.create_conn(conn_id, addr)?; } // 处理客户端断开连接 GattsEvent::PeerDisconnected { addr, .. } => { self.delete_conn(addr)?; // todo 开启广播 self.gap.start_advertising()?; } GattsEvent::Write { conn_id, trans_id, addr, handle, offset, need_rsp, is_prep, value, } => { let handled = self.recv( gatt_if, conn_id, trans_id, addr, handle, offset, need_rsp, is_prep, value, )?; // 值为true,表示是客户端的操作,例如客户端注册,注销,发送消息 if handled { self.send_write_response( gatt_if, conn_id, trans_id, handle, offset, need_rsp, is_prep, value, )?; } } GattsEvent::Confirm { status, .. } => { self.check_gatt_status(status)?; self.confirm_indication()?; } _ => (), } Ok(()) } /// 创建服务并开始广播, /// 在通知我们 GATTS 应用程序已注册后,从事件回调中调 fn create_service(&self, gatt_if: GattInterface) -> Result<(), EspError> { // 初始化结构体的 GattInterface self.state.lock().unwrap().gatt_if = Some(gatt_if); // 设置esp32设备的名字 self.gap.set_device_name("ESP32")?; // flag 标志位是一个位掩码,具体含义可以参考 Bluetooth SIG 定义的标准。 // 常见的标志位组合: // 0x01:LE Limited Discoverable Mode(有限可发现模式)。 // 0x02:LE General Discoverable Mode(通用可发现模式)。 // 0x04:BR/EDR Not Supported(不支持经典蓝牙)。 // 0x18:LE and BR/EDR Controller(同时支持 LE 和经典蓝牙)。 // 在代码中,flag: 2 表示设备处于通用可发现模式(LE General Discoverable Mode)。 self.gap.set_adv_conf(&AdvConfiguration { include_name: true, // 指示是否在广播数据中包含设备名称 include_txpower: true, // 指示是否在广播数据中包含设备的发射功率 flag: 2, service_uuid: Some(BtUuid::uuid128(SERVICE_UUID)), // 指定设备提供的服务 UUID // service_data: todo!(), // 用于广播与特定服务相关的数据 // manufacturer_data: todo!(), // 用于广播厂商自定义的数据 ..Default::default() })?; self.gatts.create_service( gatt_if, &GattServiceId { id: GattId { uuid: BtUuid::uuid128(SERVICE_UUID), inst_id: 0, // 指定服务的实例Id 如果设备支持多个相同 UUID 的服务实例,inst_id 用于区分它们 }, is_primary: true, // 指示服务是否为主服务 }, 8, )?; Ok(()) } /// 删除服务 fn delete_service(&self, service_handle: Handle) -> Result<(), EspError> { let mut state = self.state.lock().unwrap(); if state.service_handle == Some(service_handle) { state.recv_handle = None; state.ind_handle = None; state.ind_cccd_handle = None; } Ok(()) } /// 取消注册服务 fn unregister_service(&self, service_handle: Handle) -> Result<(), EspError> { let mut state = self.state.lock().unwrap(); if state.service_handle == Some(service_handle) { state.gatt_if = None; state.service_handle = None; } Ok(()) } /// 配置并且启动服务 /// 在通知我们创建服务后从事件回调中调用 fn configure_and_start_service(&self, service_handle: Handle) -> Result<(), EspError> { // 初始化service_handle服务 self.state.lock().unwrap().service_handle = Some(service_handle); // 开启gatts服务 // pub type Handle = u16; 由于u16是基本类型,实现了copy,所以下面两个函数都能使用,本质是copy了一份数据 self.gatts.start_service(service_handle)?; // 添加特性 self.add_characteristics(service_handle)?; Ok(()) } /// 添加注册的两个uuid特性到服务中 /// 在通知我们创建服务后从事件回调中调用 fn add_characteristics(&self, service_handle: Handle) -> Result<(), EspError> { // permissions 定义了客户端对该特征的操作权限。 // 在这里,Permission::Write 表示客户端可以写入该特征的值。 // 其他常见的权限包括: // Permission::Read:允许读取特征值。 // Permission::Notify:允许服务器主动通知客户端特征值的变化。 // Permission::Indicate:类似于通知,但需要客户端确认。 // properties 定义了特征的属性(Properties),描述了该特征支持的操作类型。 // 在这里,Property::Write 表示客户端可以通过写操作更新该特征的值。 // 其他常见的属性包括: // Property::Read:允许客户端读取特征值。 // Property::Notify:允许服务器发送通知。 // Property::Indicate:允许服务器发送指示 self.gatts.add_characteristic( service_handle, // 服务的唯一标识 &GattCharacteristic { uuid: BtUuid::uuid128(RECV_CHARACTERISTIC_UUID), permissions: enum_set!(Permission::Write), properties: enum_set!(Property::Write), max_len: 200, // 定义了特征值的最大长度(以字节为单位) auto_rsp: AutoResponse::ByApp, // 表示应用程序需要手动响应客户端的请求 }, &[], // 表示该特征的描述符(Descriptors)列表,&[] 表示没有附加任何描述符 )?; self.gatts.add_characteristic( service_handle, &GattCharacteristic { uuid: BtUuid::uuid128(IND_CHARACTERISTIC_UUID), permissions: enum_set!(Permission::Write | Permission::Read), properties: enum_set!(Property::Indicate), max_len: 200, // Mac iondicate data auto_rsp: AutoResponse::ByApp, }, &[], )?; Ok(()) } /// 添加 CCCD 描述 /// 只添加特征indicate fn register_characteristic( &self, service_handle: Handle, attr_handle: Handle, char_uuid: BtUuid, ) -> Result<(), EspError> { // 在找esp主动推送消息给客户端的uuid服务 let indicate_char = { let mut state = self.state.lock().unwrap(); if state.service_handle != Some(service_handle) { false } else if char_uuid == BtUuid::uuid128(RECV_CHARACTERISTIC_UUID) { state.recv_handle = Some(attr_handle); false } else if char_uuid == BtUuid::uuid128(IND_CHARACTERISTIC_UUID) { state.ind_handle = Some(attr_handle); true } else { false } }; if indicate_char { self.gatts.add_descriptor( service_handle, &GattDescriptor { uuid: BtUuid::uuid16(0x2902), // CCCD 通常用于控制特征的通知(Notify)和指示(Indicate)功能,允许客户端订阅或取消订阅特征值的变化 permissions: enum_set!(Permission::Read | Permission::Write), }, )?; } Ok(()) } /// 注册 CCCD 描述符 /// 在通知我们添加了描述符后,从事件回调中调用 /// 这段代码的作用是注册一个 CCCD(Client Characteristic Configuration Descriptor)描述符,并将其相关信息存储到内部状态中。具体功能如下: /// 验证描述符的 UUID 是否为标准的 CCCD UUID(0x2902)。 /// 确认描述符所属的服务句柄是否与内部记录的服务句柄一致。 /// 如果条件满足,则将描述符的属性句柄(attr_handle)存储到内部状态中,以便后续用于处理通知或指示功能。 /// 这种设计通常用于 BLE(蓝牙低功耗)设备的 GATT 服务实现中,确保 CCCD 的句柄被正确记录,从而支持客户端订阅或取消订阅特征值的变化 fn register_cccd_descriptor( &self, service_handle: Handle, attr_handle: Handle, descr_uuid: BtUuid, ) -> Result<(), EspError> { let mut state = self.state.lock().unwrap(); if descr_uuid == BtUuid::uuid16(0x2902) // CCCD UUID && state.service_handle == Some(service_handle) { state.ind_cccd_handle = Some(attr_handle); } Ok(()) } /// 从客户端接收消息 fn register_conn_mtu(&self, conn_id: ConnectionId, mtu: u16) -> Result<(), EspError> { let mut state = self.state.lock().unwrap(); // 找到目标客户端 if let Some(conn) = state .connections .iter_mut() .find(|conn| conn.conn_id == conn_id) { // 并且设置最大传输单元的值,字节 conn.mtu = Some(mtu); } Ok(()) } /// 创建一个新的连接 fn create_conn(&self, conn_id: ConnectionId, addr: BdAddr) -> Result<(), EspError> { // 创建指定大小的连接,如果超过,新的连接将不再处理 let added = { let mut state = self.state.lock().unwrap(); if state.connections.len() < MAX_CONNECTIONS { state .connections .push(Connection { peer: addr, conn_id, subscribed: false, mtu: None, }) .map_err(|_| ()) .unwrap(); true } else { false } }; if added { // 如果已经添加,则配置gap参数 // addr:表示目标设备的蓝牙地址(BdAddr),用于标识要配置连接参数的远程设备。 // min_int_ms:表示连接间隔的最小值(单位为毫秒)。 // max_int_ms:表示连接间隔的最大值(单位为毫秒)。 // latency_ms:表示连接延迟(单位为毫秒)。 // timeout_ms:表示超时时间(单位为毫秒)。 self.gap.set_conn_params_conf(addr, 10, 20, 0, 400)?; } Ok(()) } /// 删除一个连接 fn delete_conn(&self, addr: BdAddr) -> Result<(), EspError> { let mut state = self.state.lock().unwrap(); // Connection { peer, .. }:这是结构体解构语法,用于从 Connection 结构体中提取字段 peer if let Some(index) = state .connections .iter() .position(|Connection { peer, .. }| *peer == addr) { // remove: // 从向量中移除指定索引位置的元素。 // 将该索引之后的所有元素向前移动一位,以保持顺序。 // 时间复杂度为 O(n),因为可能需要移动多个元素。 // swap_remove: // 从向量中移除指定索引位置的元素。 // 使用最后一个元素填补空缺,不保证顺序。 // 时间复杂度为 O(1),因为只涉及少量操作。 state.connections.swap_remove(index); } Ok(()) } /// 一个辅助方法,用于处理向我们发送数据到 “recv” 特征的客户端 #[allow(clippy::too_many_arguments)] fn recv( &self, _gatt_if: GattInterface, conn_id: ConnectionId, _trans_id: TransferId, addr: BdAddr, handle: Handle, offset: u16, _need_rsp: bool, _is_prep: bool, value: &[u8], ) -> Result<bool, EspError> { let mut state = self.state.lock().unwrap(); let recv_handle = state.recv_handle; let ind_cccd_handle = state.ind_cccd_handle; let Some(conn) = state .connections .iter_mut() .find(|conn| conn.conn_id == conn_id) else { return Ok(false); }; if Some(handle) == ind_cccd_handle { // 订阅或取消订阅我们的(indication characteristic)指示特性 if offset == 0 && value.len() == 2 { let value = u16::from_le_bytes([value[0], value[1]]); if value == 0x02 { if !conn.subscribed { conn.subscribed = true; self.on_subscribed(conn.peer); } } else if conn.subscribed { conn.subscribed = false; self.on_unsubscribed(conn.peer); } } } else if Some(handle) == recv_handle { // Receive data on the recv characteristic self.on_recv(addr, value, offset, conn.mtu); } else { return Ok(false); } Ok(true) } /// 辅助方法,向Peer客户端发送响应节点,该 Peer 节点刚刚向我们发送了 “recv” 上的一些数据 /// characteristic. (特征) /// 这只是必要的,因为我们支持写确认(与未确认的写入相比,这是更复杂的情况) #[allow(clippy::too_many_arguments)] fn send_write_response( &self, gatt_if: GattInterface, conn_id: ConnectionId, trans_id: TransferId, handle: Handle, offset: u16, need_rsp: bool, is_prep: bool, value: &[u8], ) -> Result<(), EspError> { // 是否需要处理 写确认 if !need_rsp { return Ok(()); } // 是否准备好了数据 if is_prep { let mut state = self.state.lock().unwrap(); state .response .attr_handle(handle) .auth_req(0) .offset(offset) .value(value) .map_err(|_| EspError::from_infallible::<ESP_FAIL>())?; self.gatts.send_response( gatt_if, conn_id, trans_id, GattStatus::Ok, Some(&state.response), )?; } else { self.gatts .send_response(gatt_if, conn_id, trans_id, GattStatus::Ok, None)?; } Ok(()) } /// 处理下一个 indication fn confirm_indication(&self) -> Result<(), EspError> { let mut state = self.state.lock().unwrap(); if state.ind_confirmed.is_none() { // Should not happen:表示我们已收到 // 我们没有发送一个指示(indication) // unreachable!() 是 Rust 提供的一个宏,用于标记代码中“不应该到达”的位置,到这里会恐慌 unreachable!(); } // 通知主循环可以发送下一个indication state.ind_confirmed = None; // So that the main loop can send the next indication self.condvar.notify_all(); Ok(()) } fn check_esp_status(&self, status: Result<(), EspError>) { if let Err(e) = status { warn!("检查esp的状态错误为: {:?}", e); } } fn check_bt_status(&self, status: BtStatus) -> Result<(), EspError> { // matches! 是匹配模式,!取反 // bt状态不匹配就抛连接失败异常 if !matches!(status, BtStatus::Success) { warn!("Got status: {:?}", status); Err(EspError::from_infallible::<ESP_FAIL>()) } else { Ok(()) } } fn check_gatt_status(&self, status: GattStatus) -> Result<(), EspError> { if !matches!(status, GattStatus::Ok) { warn!("gatt的状态错误: {:?}", status); Err(EspError::from_infallible::<ESP_FAIL>()) } else { Ok(()) } } } 新建一个ble_recv_message.rs文件,处理BLE的消息接收use log::{error, info}; use crate::{driver_manage::{GLOBAL_LED}, message::{LedMessage, Message}}; pub fn handle_message(src:&str) -> anyhow::Result<()>{ let message = Message::from_str(src); if let Ok(message) = message{ match message { Message::Led(led_message) => { handle_led_message(led_message)? }, Message::Unknown => { error!("收到错误的类型") }, } } anyhow::Ok(()) } fn handle_led_message(led_message:LedMessage)->anyhow::Result<()>{ info!("{:?}",led_message); if led_message.value == 1{ let mut guard = GLOBAL_LED.lock().unwrap(); guard.as_mut().unwrap().set_high()?; }else { let mut guard = GLOBAL_LED.lock().unwrap(); guard.as_mut().unwrap().set_low()?; } anyhow::Ok(()) } 新建message.rs,处理消息传输,序列化跟反序列化 use serde::{Deserialize, Serialize}; #[derive(Debug,Serialize,Deserialize)] #[serde(tag="type")] pub enum Message{ #[serde(rename = "led")] Led(LedMessage), #[serde(other)] Unknown } #[derive(Debug,Serialize,Deserialize)] #[serde(rename_all = "camelCase")] pub struct LedMessage{ // 0关,1开 pub value:u8 } impl Message{ pub fn to_json(&self) -> serde_json::Result<String>{ serde_json::to_string(self) } pub fn from_str(src:&str) -> serde_json::Result<Self>{ serde_json::from_str(src) } } 新建driver_manage.rs文件,用来管理注册的外设use std::sync::Mutex; use esp_idf_hal::{gpio::{AnyIOPin, AnyOutputPin, Gpio9, Output, OutputPin, PinDriver}, peripheral::Peripheral, prelude::Peripherals}; pub static GLOBAL_LED :Mutex<Option<PinDriver<'static,AnyOutputPin,Output>>> = Mutex::new(None); pub fn init_global(led_gpio:AnyOutputPin) -> anyhow::Result<()>{ { let led = PinDriver::output(led_gpio)?; let mut guard = GLOBAL_LED.lock().unwrap(); *guard = Some(led); } anyhow::Ok(()) } 编辑main.rs文件 use esp_idf_hal::{ gpio::OutputPin, prelude::Peripherals}; use esp_idf_svc::{log::EspLogger, nvs::EspDefaultNvsPartition}; mod ble_server; mod driver_manage; mod message; mod ble_recv_message; fn main() -> anyhow::Result<()> { esp_idf_svc::sys::link_patches(); EspLogger::initialize_default(); let peripherals = Peripherals::take()?; let nvs = EspDefaultNvsPartition::take()?; driver_manage::init_global( peripherals.pins.gpio12.downgrade_output())?; ble_server::start(peripherals.modem,nvs.clone())?; anyhow::Ok(()) } 效果展示成功接收到客户端消息